
This HOWTO describes how to rename a VMware virtual machine’s underline files inside the VMFS file system. It turns out that the name that is displayed in the vSphere Web Client and VI Client is simply a display name. It is actually attached to an underline UUID that describes that machine. That UUID is associated with a physical folder and files in the file system. When you rename a virtual machine from inside the host and even when you rename it from vCenter, these files do not change. This can lead to future confusion when you find what you think is an old VM and try to delete it. Following the steps below will ensure that the machine name is consistent throughout the VMware ecosystem.
Important Note: Unless you’re comfortable with the steps below, do not proceed. This is one of those cases where literally one wrong character can permanently corrupt a VM – or worse.
Before you start, you must ensure that:
- The virtual machine has been powered down
- The virtual machine does not have snapshots or virtual disks shared with other virtual machines
-
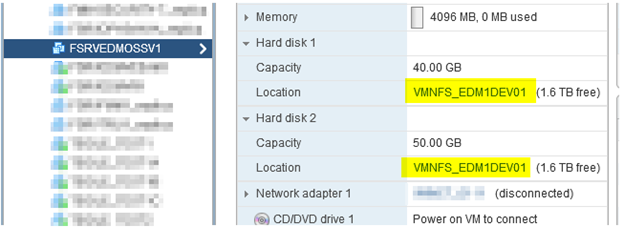
Our journey begins with the VM called FSRVEDMOSSV1. For testing purposes, let’s say we want to rename this to FSRVEDMOSSV1B.
-
Take note of which datastore the VM is currently located on as we’ll need to know that shortly. In this case it is VMNFS_EDM1DEV01
-
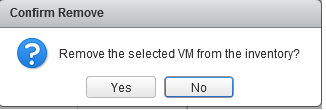
From the Web client, find the VM, right click and choose All vCenter Actions / Remove from Inventory
- Do not select Delete from disk as that is not what we want. We simply want to remove the existing name so we can later add it back under the new name

- Choose yes when prompted
-
Next open up an SSH session to an ESXi host in the cluster that has a connection to the datastore noted above. (Figuring out how to do this is beyond the scope of this HOWTO)
-
Note: I strongly recommend turning on Putty logging so you can record exactly what you do in case you make a mistake and need to undo it
-
- Type cd /vmfs/volumes/[datastorenamefromabove]/[servername]
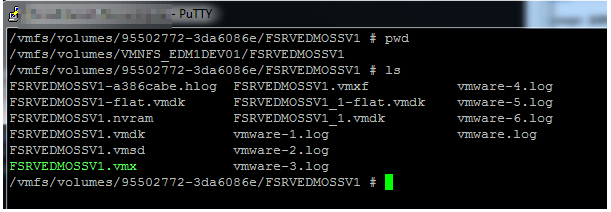
- Note the filenames all contain the original name FSRVEDMOSSV1 and not FSRVEDMOSSV1B like we want. Likewise the configuration inside the files is also pointing here. We have to fix both.
- The next steps can be broken down into two phases – file renames and configuration edits.
File Renames
- Using putty double click on each file name to automatically select it
-
Type mv <Right click with the mouse to paste> <space> <right click again to paste> and go back and edit the second name to the one you want.
- Note the use of the right click technique is designed to prevent spelling mistakes as the system will do whatever you tell it to
- Note the use of the right click technique is designed to prevent spelling mistakes as the system will do whatever you tell it to

Configuration Renames
- There are several files that are plain text and must be edited to reflect the new name. While you can go in and do this by hand, it is very prone to human error. So instead will use a wonderful linux tool called sed
- This tool will do a find and replace on all instances of a line in a file.
- There are types of files that need to be edited – **vmdk, vmx, and vmxf
- ** Note that there are two types of .vmdk files. One of them includes –flat on the end of the file name and this is the actual hard disk itself. If you run the command below on a –flat file you will destroy the VM!
- Note: The more virtual disks attached to the VM you have, the more .vmdk and –flat.vmdk files you will have
sed -i -e ‘s/FSRVEDMOSSV1/FSRVEDMOSSV1B/g’ FSRVEDMOSSV1B.vmx
sed -i -e ‘s/FSRVEDMOSSV1/FSRVEDMOSSV1B/g’ FSRVEDMOSSV1B.vmxf
sed -i -e ‘s/FSRVEDMOSSV1/FSRVEDMOSSV1B/g’ FSRVEDMOSSV1B.vmdk
sed -i -e ‘s/FSRVEDMOSSV1/FSRVEDMOSSV1B/g’ FSRVEDMOSSV1B_1.vmdk
- If the commands are successful, you will not get any kind of output

- Lastly we need to rename the folder that the VM lives in to match the new name
-
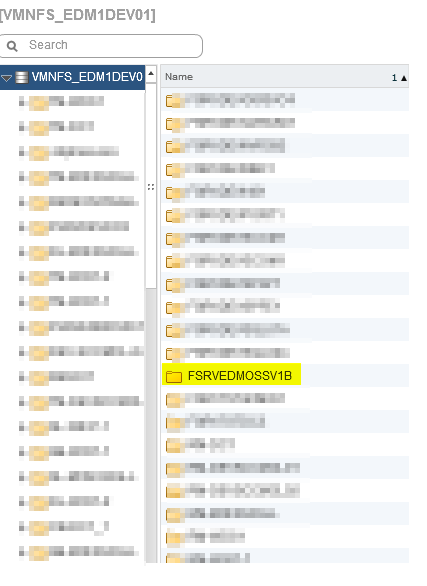
Browse into the root of the datastore and type mv [oldname] [newname]

- At this point, the VM base files have been successfully renamed
- The last step now is to add the VM back to vCenter
- Browse to the datastore that you noted above (How to do so is outside the scope of this HOWTO)
-
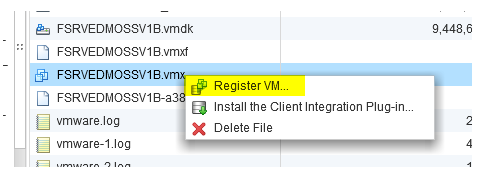
Find the VM folder that you just renamed and browse inside it
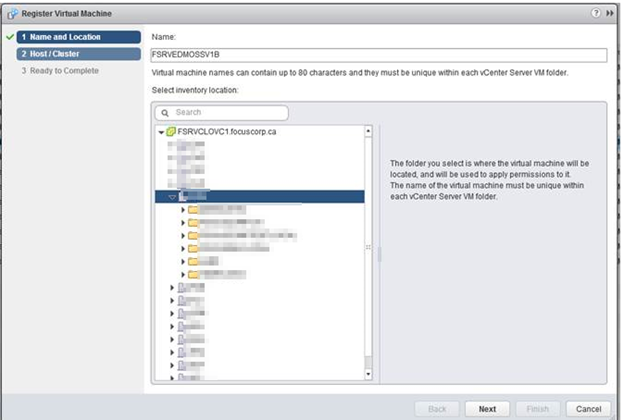
- Right click on the .vmx file and choose Register VM
- Place the VM in the desired datacenter folder and cluster
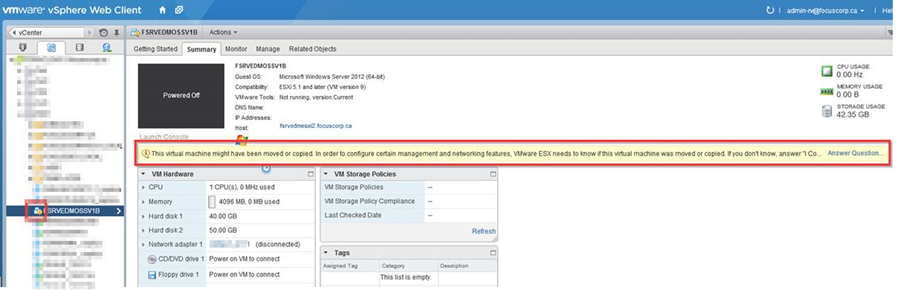
- You’ll find that the VM is once again listed in vCenter and is displayed with the new name
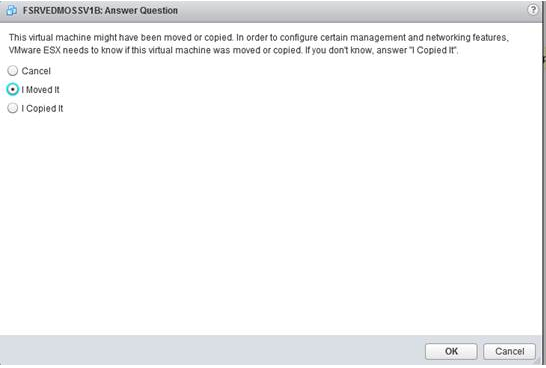
- Attempt to Power on the VM. After a short while you’ll get a message saying “This virtual machine might have been moved or copied” Press Answer question on the right
- You will be prompted to state if you copied or moved the VM. This is basically asking if it should retain the same MAC address or get a new one. Choose I moved it
- You can verify the VM boots properly by connecting to the console
- That’s it, you have successfully renamed a virtual machine
Robbie