
This HOWTO describes how to reconfigure an existing NetApp DataFabric Manager installation with preexisting Snap Vault relationships when the primary hostnames and IPs change and to accomplish all of this without needing to re-baseline.
Consider the situations where you have a NetApp Filer that you want to replace with a new Windows file server but you want the Windows server to continue to backup the data via an already existing OSSV relationship. Or more specifically:
| Device Type | Current Device Name | Current IP Address | Former Device Name | Former IP Address |
Existing SnapVault |
| Windows 2012 VM | FSRVDPHSAN1 | 10.32.0.32 | FSRVDPHSAN1A | 10.32.112.x (DHCP) |
Yes |
| NetApp FAS2040 | FSRVDPHSAN1B | 10.32.0.37 | FSRVDPHSAN1 | 10.32.0.32 |
Yes |
Before you can do anything inside of DFM, you need to update the Snapvault relationships themselves. NetApp does a good job of documenting these steps here:
https://kb.netapp.com/support/index?page=content&id=1010282&locale=en_US
Unfortunately, I couldn’t find any documentation for the DFM update hence the need for the documentation below.
- Log into DFM and go to Control Center / Member Details / Physical Systems and select the Physical NetApp Filer
- On the left hand pane, choose Edit Settings
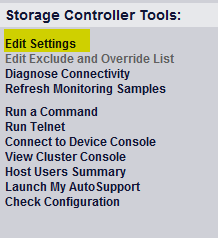
- Modify the Primary IP Address to match the new IP address that you’ve already changed the Filer too

- Next, RDP into your DFM box
- Open a command prompt and type dfm host diag fsrvdphsan1
- You’ll note under the hostname field that the name DFM knows no longer matches the name it’s getting via NDMP from the filer now that we’ve changed the IP

-
To fix this type dfm host rename fsrvdphsan1.focuscorp.ca
- Note: You must provide the FQDN for the name
- Note: You must provide the FQDN for the name

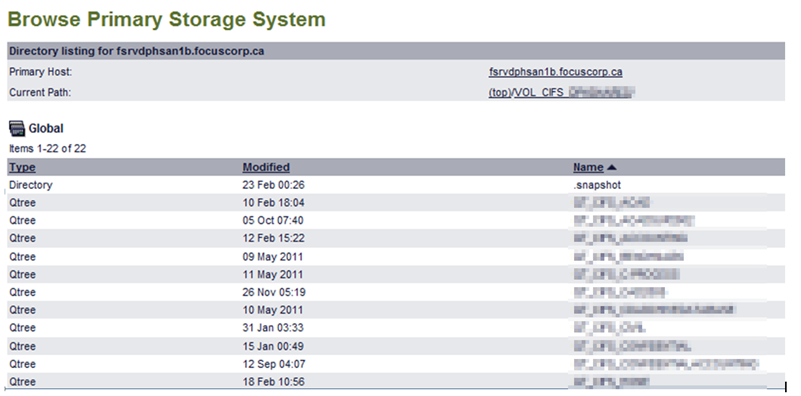
- At this point, the Filer should now be respond properly inside DFM
- You can validate this by going to the Backup tab, selecting fsrvdphsan1b and choosing Browse. If it shows you the qtrees on the filer, it’s working properly
- Now we need to get the Windows OSSV client renamed and online. Unfortunately, there is no “rename” command for OSSV primaries in DFM
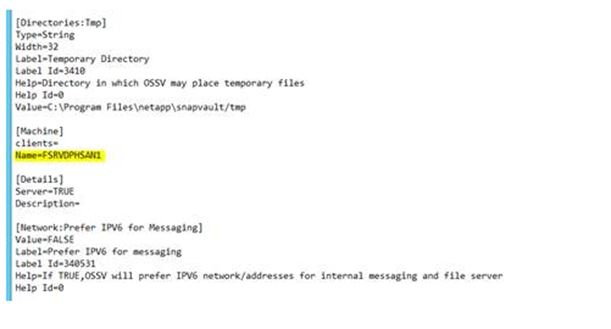
- First we need to modify the configuration of the OSSV client as it will still be configured with the old hostname (despite the actual server having already been renamed)
- Open Notepad as an administrator on the new server and edit the file C:\Program Files\netapp\snapvault\config\configure.cfg
- Search for the old hostname and when found, modify it to be the new hostname and save
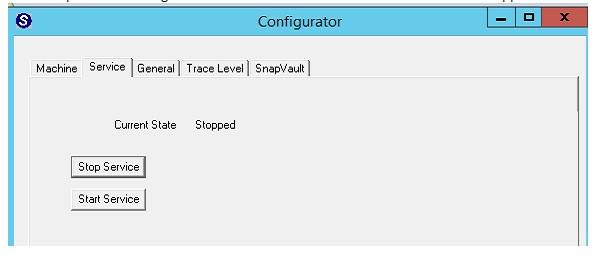
- I found that simply restarting the NetApp agent service is not enough to update the new name
-
Instead you need to first stop NetApp agent
service and then open task manager and end process on svpmgr.exe

- Start NetApp agent service
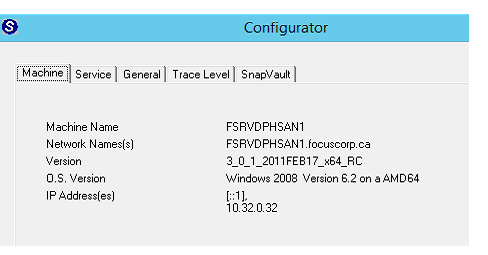
- Open OSSV Configurator. You’ll note that the service is still marked as stopped. Start it
Now when you look at the Machine Name field, it should be correct
- Next we need to tell DFM to delete its control over this object as the hostname is tied to the DFM object and cannot be changed
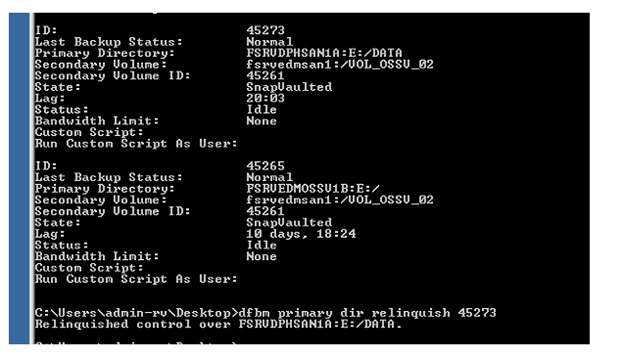
- From the DFM command prompt, type dfbm primary dir list
- This will show you all of the existing relationships
- Find the one you wish to change and note the ID field
- Now type dfbm primary dir relinquish [ID]
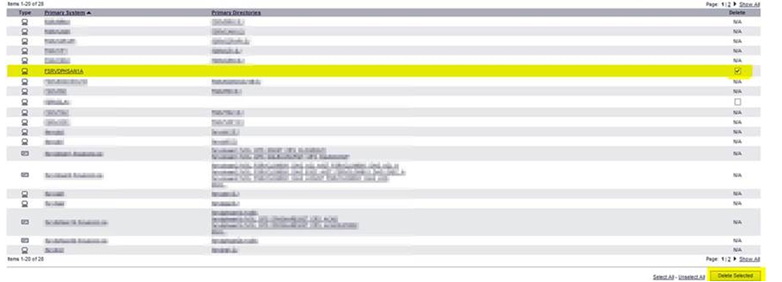
- Now go back to the DFM Web management console and select Backup / Primary Systems
- Find the system you wish to remove. Note that it should no longer have a primary directory associated with it. Select it and choose Delete Selected
-
Now we need to add the system back as if it was the first time. Select the Storage Systems tab and fill in the details
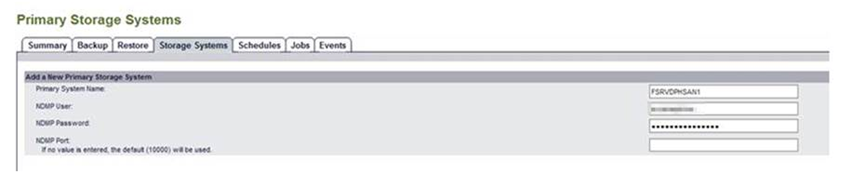
- If we now look at the Jobs tab, you will see that it realized there was already an existing relationship and so imported the existing backup relationship

- At this point DFM should now be functioning normally again