
This HOWTO describes how to create a bootable USB recovery CD for Macrium Reflect. This in itself isn’t terribly useful in itself as the Reflect Software offers an excellent GUI based wizard to accomplish this. However, the default Windows PE environment it creates does not include ISCSI support which means if your backups are stored on an ISCSI NAS as mine are, it will not be possible to actually connect to your storage to restore your backups after a disaster. Following this guide will enable you to restore Reflect based backups off ISCSI storage.
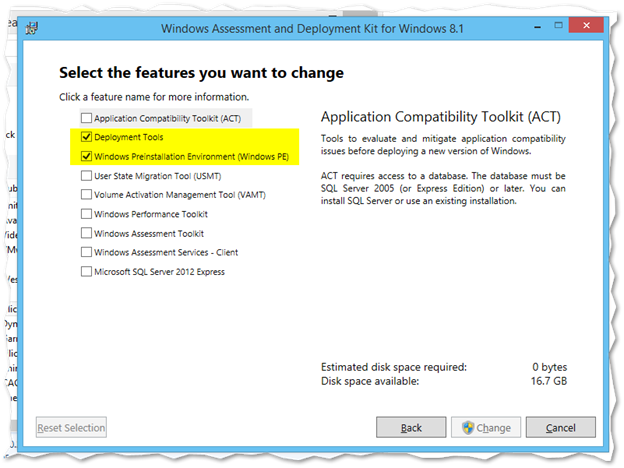
- An important note: When you first run Reflect and a new Windows PE version is available, it’ll prompt you and ask to make a 401MB download from Microsoft. I thought this was the Windows Assessment and Deployment Kit (WADK) for Windows 8.1 but it only includes a subset that doesn’t include the additional packages we need to make ISCSI work. So before you begin this process, download the WADK for Windows 8.1 (http://www.microsoft.com/en-us/download/details.aspx?id=30652)
- You only need Deployment Tools and Windows Preinstallation Environment (Windows PE)
-
Also, if you already have the Windows 8.0 ADK installed, you will need to manually uninstall it before proceeding to install the Windows 8.1 ADK. In other words, ensure your WADK version matches your Windows PE version
- The base Reflect WIM image they already created for us that includes the Reflect recovery software can be found at C:\boot\Macrium\WA5KFiles\media\sources\boot.wim
-
So to make sure we don’t break that, let’s make a copy
copy “C:\boot\Macrium\WA5KFiles\media\sources\boot.wim” to c:\temp\reflect.wim
-
Create folder called c:\mnt that we will use the mount the WIM image and then mount it with the command below
md c:\mnt
dism /mount-image /imagefile:c:\temp\reflect.wim /index:1 /mountdir:c:\mnt

-
We will now use the dism command to mount the packages we need to make ISCSI work. The syntax looks like:
Dism /image:C:\mnt /add-package /packagepath:”C:\Program Files (x86)\Windows Kits\8.1\Assessment and Deployment Kit\Windows Preinstallation Environment\amd64\WinPE_OCs\winpe-wmi.cab”

- All told, you need to install the following packages:
#Add WMI
Dism /image:C:\mnt /add-package /packagepath:”C:\Program Files (x86)\Windows Kits\8.1\Assessment and Deployment Kit\Windows Preinstallation Environment\amd64\WinPE_OCs\winpe-wmi.cab”
Dism /image:C:\mnt /add-package /packagepath:”C:\Program Files (x86)\Windows Kits\8.1\Assessment and Deployment Kit\Windows Preinstallation Environment\amd64\WinPE_OCs\en-us\winpe-wmi_en-us.cab”
#Add Storage WMI
Dism /image:C:\mnt /add-package /packagepath:”C:\Program Files (x86)\Windows Kits\8.1\Assessment and Deployment Kit\Windows Preinstallation Environment\amd64\WinPE_OCs\winpe-storagewmi.cab”
Dism /image:C:\mnt /add-package /packagepath:”C:\Program Files (x86)\Windows Kits\8.1\Assessment and Deployment Kit\Windows Preinstallation Environment\amd64\WinPE_OCs\en-us\winpe-storagewmi_en-us.cab”
- Here you are adding the WMI and the Storage WMI packages which are necessary to make ISCSI connectivity work. The reason it is two packages each is that the base cab includes the actual code and the *_en-us includes the localization. Both are required to make this work
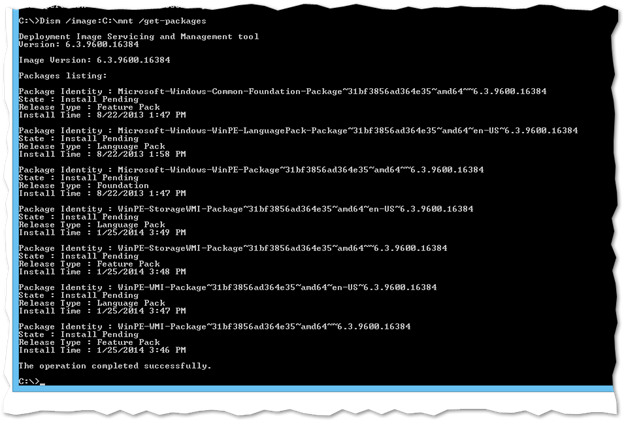
- When you’re done, you can verify the packages were added by running
Dism /image:C:\mnt /get-packages
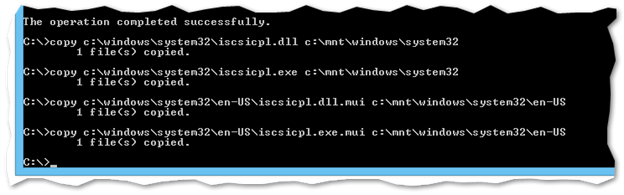
- Next we need to copy the ISCSI control panel over so we have a GUI based means of adding our ISCSI target. Note this must be done from the same version of Windows that your WinPE image is. IE if WinPE is 5.0 (aka 8.1), you need to copy the iscsi* files from a Windows 8.1 client
copy c:\windows\system32\iscsicpl.dll c:\mnt\windows\system32
copy c:\windows\system32\iscsicpl.exe c:\mnt\windows\system32
copy c:\windows\system32\en-US\iscsicpl.dll.mui c:\mnt\windows\system32\en-US
copy c:\windows\system32\en-US\iscsicpl.exe.mui c:\mnt\windows\system32\en-US
-
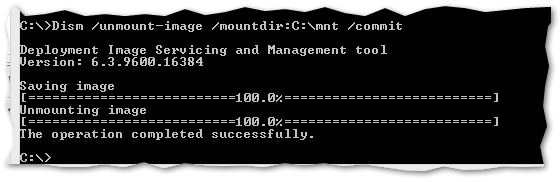
We are now finished with our WIM image and so we need to commit our changes
Dism /unmount-image /mountdir:C:\mnt /commit
- Now we need to create a USB key or ISO with this new WIM image. We can use Reflect to do that
- Open Macrium Reflect
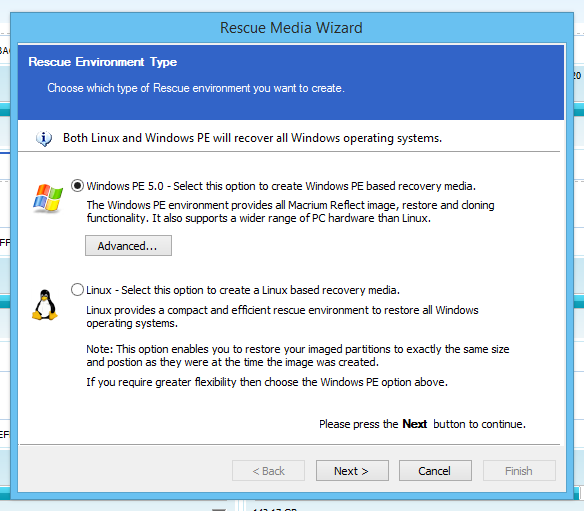
- Choose Tools / Create Rescue Media
- Select the Windows PE version you’d like to use. As they recently added WinPE 5.0 support (aka Windows 8.1) and I’m running Windows 8.1, we’ll select that under Advanced
- Press Next
- You will see a list of drivers found that Reflect will automatically include in the WinPE image for your machine. Most notably you’ll see the network card driver is present which is critical for us to later restore from ISCSI
- Note: If you find that USB Root Hub (xHCI) has an exclamation mark on it and a status of Device Detected, I found that installing patch KB2911106 and rebooting seemed to fix this. This might be a red herring though as this was the only outstanding patch on my machine

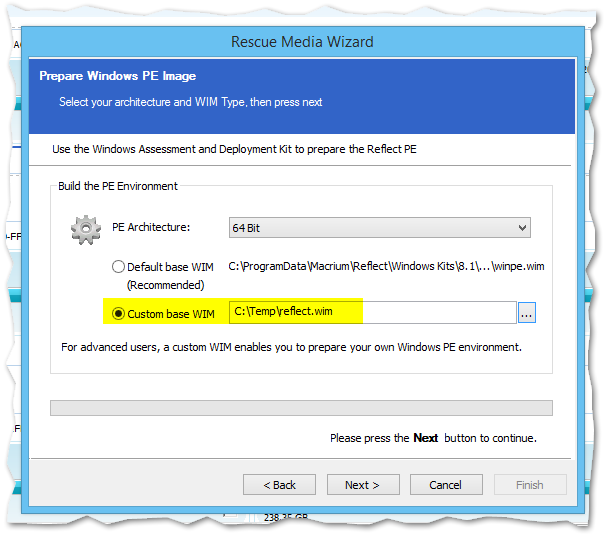
- Select 64 Bit PE Architecture and for select Custom base WIM and provide the path to the WIM image you modified
- Press Next
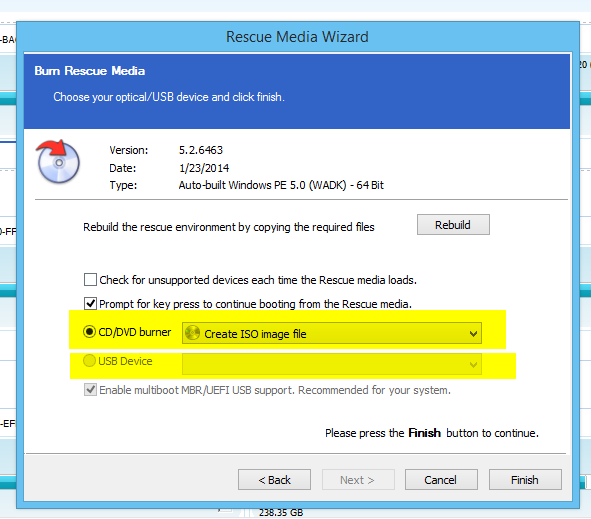
- At this point, create either an ISO or USB key. I find I make the ISOs first and test them in a virtual machine to make sure they work before writing the USB key
- When it finishes, press OK
- Now boot from this image either from the ISO or via USB. During boot you’ll see the Reflect splash screen
-
Once it’s done, open a command prompt from the start menu

- Because the Microsoft ISCSI service is not started by default, we’ll start it manually here

- Once it runs successfully, open the ISCSI control panel by typing iscsicpl
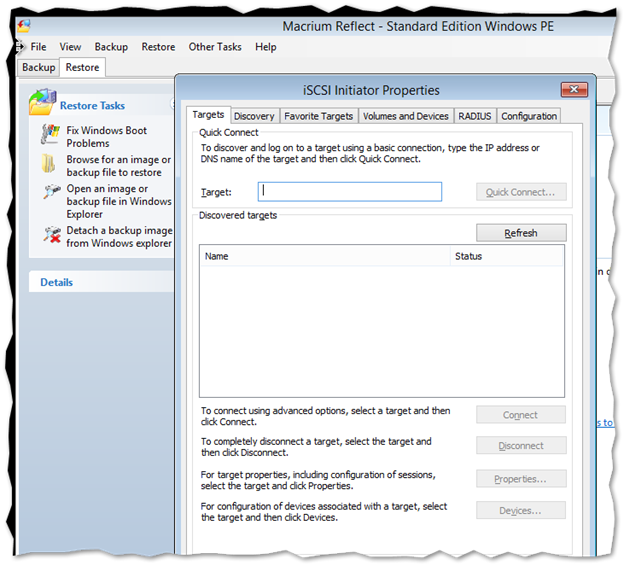
Congratulations, you can now connect your Reflect USB Key or ISO to perform a full system recovery in the event of a major disaster