Being in IT means I have to take a lot of screenshots for use in various kinds of documentation. With the release of Windows Vista/7, Microsoft included the “Snipping Tool” which proved to be an invaluable improvement over any free solution I used at the time. That is to say, alt-print screen and mspaint. Snagit was always available but not only was it a commercial product but it grew to be a beast in terms of functionality and size. I just wanted a simple screenshot tool that would allow for simple annotations.
Once I started posting this blog more regularly, I quickly realized I needed a way to obfuscate certain work related screenshots before publication. Using the snipping tool, this proved to be a pain in the butt as there are no shape tools… or anything really. With that in mind I finally decided to sit down and “see what’s out there” for free screenshot solutions. As you might expect, there are many, many of them. Over the course of nearly 2 hours, I installed more than a dozen tools. Some promising, some crap but none of them did exactly what I wanted.
My objective was to find a tool that had that met the following requirements:
- Tiny in file size, memory footprint and UI
- Portable (that is to say no installation is necessary
- Supports keyboard shortcuts so I can press a single key combination to select a region of the screen
- Simple annotation tools (I would have been able with the ability to draw only boxes)
After much looking, I found what is now one of my new favorite must have tools. It’s called Greenshot (http://getgreenshot.org/)
It met all of my requirements above, and more. It gives a full suite of annotation tools that have keyboard shortcuts to access. It has a Photoshop style layering capability for those annotations so you can adjust and manipulate them after you’ve created them.
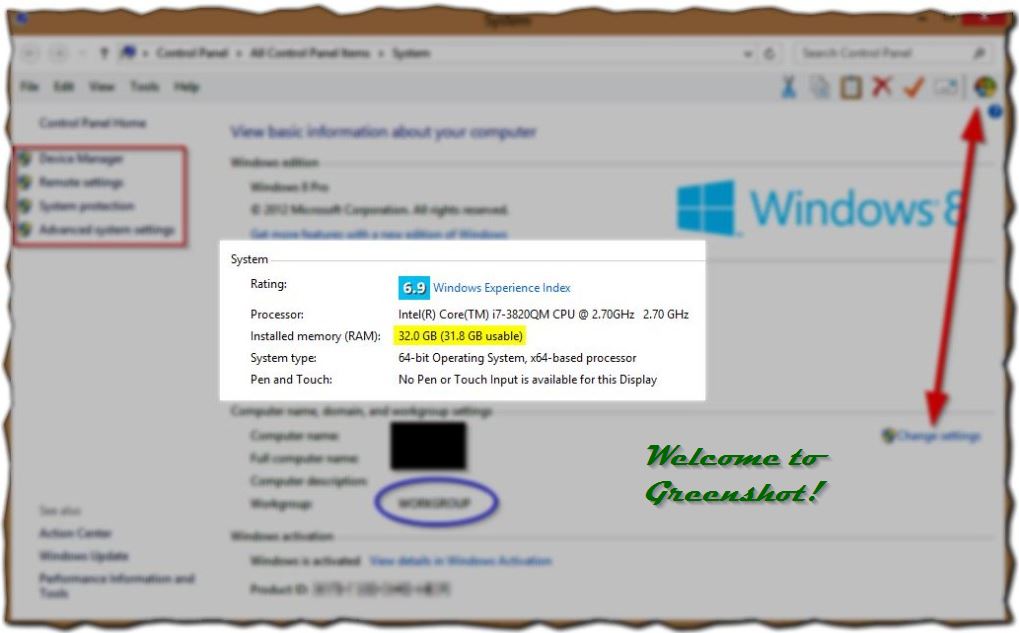
I just made a quick screenshot showing off some of the annotation features including but not limited to:
- Torn edges
- Rectangles and circles with full fill and color selectors
- Highlight tool that is a shape and can be resized after creation so you can make it pretty
- Arrows
- Obfuscate tool (notice the Product ID is unreadable)
- Highlight area (notice everything outside of the System section is faded to draw further attention to it
- Text (Notice it says Greenshot Annotations in the top right – this has full formatting capabilities)
There is still more but if you do a lot of screenshots then I’m pretty sure you’ve stopped reading it at this point and downloaded it for yourself already. This product has completely transformed how I take screenshots. It’s so good in fact that I donated cash to their donation site not 10 minutes after installing it. If you like it, I encourage you to do the same. The world needs more software like this:
Simple, focused and purpose built.
Enjoy!


1 comments
Greenshot is a fantastic program!
Great write-up