This HOWTO explains how to configure a completely fresh environment with Dynamics NAV 2018 and the Contact Insight Dynamics NAV Outlook Addin on-premises while using Azure AD for authentication.
The reason this HOWTO was created is a customer wanted to use the Contact Insights NAV plugin for Outlook. It was determined that this plugin does not support the default “Windows” based authentication NAV uses by default and instead must use either “NavUserPassword” authentication or AzureAD authentication. The latter provides a more single sign on experience and since the customer already uses Office 365, it was decided to implement the addin using AzureAD.
Unfortunately the documentation Microsoft provides is lacking in the implementation details and so there has been considerable banging my head against the wall. Now that I’ve gotten it working, I wanted to document my steps for the benefit of both others and for future me.
This HOWTO is partially based on the official Microsoft guides for configuring AzureAD and the Outlook addin and are available here:
https://docs.microsoft.com/en-us/dynamics-nav/authenticating-users-with-azure-active-directory
https://docs.microsoft.com/en-us/dynamics-nav/setting-up-office-add-ins-outlook-inbox
In order to proceed, you will need the NAV 2018 installation media. That can be downloaded at the link below and at the time of this writing the newest version available is Cumulative Update 20.
Note: This free download can be used to install the full application and includes a demo license and database that will be sufficient for testing
https://www.microsoft.com/en-us/download/details.aspx?id=58503&WT.mc_id=rss_alldownloads_all
Here is what our lab environment looks like. For your purposes, please replace any reference to company to the name of your Office 365 tenant or domain name as appropriate
Environment Summary
– Firewall: 10.0.0.1
– Domain Controller: DC1 – Windows Server 2012 R2 (10.0.0.11) (Domain: company.local)
– NAV 2018 Server: NAV1– Windows Server 2012 R2 (10.0.0.21)
– Client Machine: CLIENT1 – Windows 10 1607 (DHCP) (Important: The Outlook addin does not work on Windows 2012 R2, it just hangs at the Dynamics logo and 3 dots forever run across the top of the screen)
– Office Version: Office 2019 Proplus
– Global admin permissions to Azure AD tenant
– AzureAD Tenant Name: company.onmicrosoft.com
– AzureAD testuser: rv_testuser@company.com
– Certificate: Wildcard certificate for *.company.com
Configure Azure to Accept Authentication Requests from NAV
– In a web browser, log into https://portal.azure.com as a global admin and search for App Registrations
– Choose New Registration
– The user display name can be anything
– For our purposes we will only allow connections from existing internal users so we’ll select the single tenant option
– For the Redirect URI, enter https://nav.company.com/NAVOutlook. This points to your NAV server instance. We will create the required DNS entries, firewall rules and NAV Instance in the remainder of this HOWTO
– Select the Manifest section and under identiferURis add https://company.onmicrosoft.com/NAVOutlook
– This step is crucial. Otherwise you will receive an error on authentication about “identifier not found”
– That is all that is required for minimum configuration on the Azure side. You do not need to add additional Reply URLs or other API permissions.
Install Certificate on your NAV Server
– Copy your PFX file for your wildcard certificate onto your NAV server, double click it and install it to Local Machine. Select Mark this key as exportable and chose Automatically deploy to default location
– We are going to use the NETWORK SERVICE account default as our NAV service account. In order to prevent certificate errors in event viewer, we have to give read permission for Network Service to the certificate
– The fix is based on this article: http://www.zerohoursleep.com/2010/11/a-fatal-error-occurred-when-attempting-to-access-the-ssl-server-credential-private-key/
– Open an admin command prompt on the NAV server and type cd c:\programdata\microsoft\crypto\MachineKeys
– Type dir/a
– Note the various certificate IDs
– Type certutil –store my
– Copy the unique container name into your clipboard
– Type icacls 1f8488538ffbc80c8aee8310d005705f_ccfaf0de-1e84-4c95-b9db-71e34bfd4a7e /grant “Network Service”:(R)
Install Windows Search Service
– Add the Windows Search Service from Server Manager features as it’s required for the installation of NAV 2018
Configure DNS Records
– Open DNS and create a static internal record for nav.company.com, ie the domain for which you have a certificate for (you’ll need to create a new zone)
– Log into your public/external DNS service and create a DNS record for nav.company.com there as well only this time point to the external IP where your NAV server resides
– On your firewall, configure it to forward TCP 443 traffic to your NAV server
Install NAV 2018
– Extract the contents of CU 20 NAV 2018 NA.zip you downloaded from the link at the top of this HOWTO into a temp folder
– That zip file contains a folder called Application and another zip called NAV.11.0.34561.NA.DVD.zip. The application folder can be ignored as it’s only needed for upgrades. Extract the contents of the second zip file into C:\NAVINST
– Run C:\NAVINST\setup.exe
– Select Choose Installation Option and then select Custom
– Install everything except ironically the Outlook and Excel addins as Outlook will not be installed on the server (the Outlook addin we are using is different)
– Be sure to check the Demo Database and Development Environment (C/SIDE) sub menus
– Leave the next screen as defaults but make note of them as we’ll use them later
– SQL Express will be automatically installed as indicated
– Important Note: The installer requires .Net 4.7. If it’s not present it will install it automatically but the installer will error out at the end and will require a reboot. You then manually have to repeat the steps above again to complete the installation
Configure new NAV Instance
– Once installed, open Dynamics NAV 2018 Administration from the start menu. The default Instance is called DynamicsNAV110 and will be stopped by default. Start this instance
– Launch the Dynamics NAV 2018 icon from the start menu and verify that it can connect successfully
– At this point we should have a basic version of NAV running. Crucially, the default instance DynamicsNAV110 should be considered our production instance. It is by default configured to use Windows authentication. We will assume we already have users accessing this
– In order to use the Contact Insights Dynamics NAV Outlook Addin, we must use either NavUserPassword or AccessControlService authentication. Windows authentication is not supported
– We don’t want to break the current functionality so instead we’re going to make a new instance
– In the NAV Administration console, right click on the left hand root and choose Add Instance
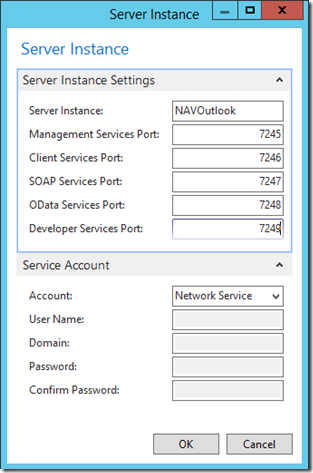
– Give the Instance a NAV. You’ll type this a lot so make it something easy like NAVOutlook
– You have to assign each of the ports for each of the services and these ports must be different than the ports already assigned to your DynamicsNAV110 instance. Here I’m using 7245-7249
– The new instance will take on the same settings from the default instance but we’ll need to make some changes
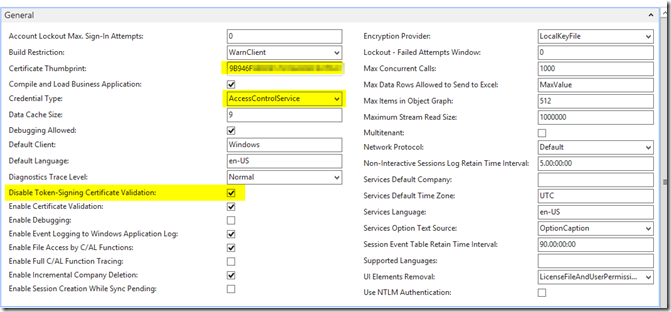
– First we need to assign our SSL certificate. To do that we need to get the thumbprint for the certificate we installed earlier. To do that open an administrative command prompt and type Get-ChildItem cert:\LocalMachine\My
– Copy the thumbprint into your clipboard
Make the following changes:
– Paste the information you just copied into the Certificate Thumbprint textbox
– Change the credential type to AccessControlService
– As per Microsoft documentation, check the box for Disable Token-Signing Certificate Validation
– Under Client Services, populate the Web Client Base URL with the following URL: https://nav.company.com:443/NAVOutlook
– Under SOAP Services select Enable SSL and for the SOAP Base URL enter https://nav.company.com:7247/NAVOutlook/WS
– Under ODATA Services, check Enable SSL and enter the URL https://nav.company.com:7248/NAVOutlook/OData/
– Under Azure Active Directory (Azure AD), populate the two highlighted fields as shown:
WS-Federation Login Endpoint: https://login.microsoftonline.com/company.onmicrosoft.com/wsfed?wa=wsignin1.0%26wtrealm=https://company.onmicrosoft.com/NAVOutlook
Replace company with your AzureAD tenant name and replace the GUID on the end with the application client ID you created in the Azure step above
WS-Federation Metadata Location: https://login.microsoftonline.com/company.onmicrosoft.com/FederationMetadata/2007-06/FederationMetadata.xml
Replace company with your Azure AD tenant name
Press Save and then manually start the service to apply the changes
Create User Account
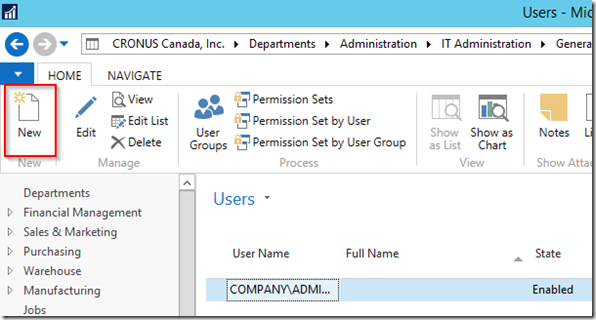
– In the Dynamics NAV 2018 app which you opened earlier as the administrator account, go to the search bar and search for Users. Click on the first Users result
– Click New to create a new user
– Create the user name. This can be anything but to make life easier should match the username of their Office 365 account
– Under Office 365 Authentication, enter this users Office 365 UPN. This is what connects this user to their Azure AD account for the purposes of authentication
– For testing, assign this user D365 Full Access user group and give it SUPER permissions and assign the account a password
Configure Web Access
– When you created a new instance above, that process only creates the desktop client access. It does not configure the Web client access. To do that we have to use PowerShell
– Launch the Dynamics NAV Administration Shell as administrator
– Type New-NAVWebserverInstance –Server NAV1 –WebServerInstance NAVOutlook –ServerInstance NAVOutlook
– Launch IIS Manager on the NAV server
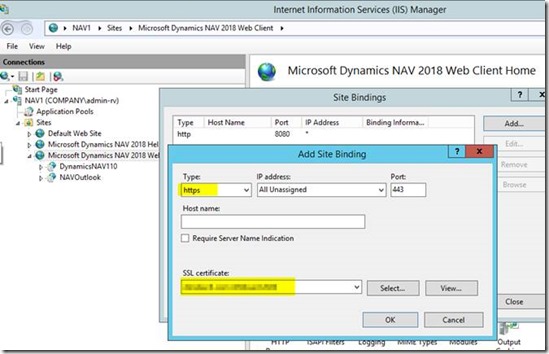
– Select the Microsoft Dynamics NAV 2018 Web Client folder and choose Edit Bindings and add HTTPS and select your certificate
– In a text editor open the file c:\inetpub\wwwroot\NAVOutlook\navsettings.json
– Change the ClientServicesCredentialType from Windows to AccessControlService
– Update the ClientServicesPort and ManagementServicesPort to ones you configured (in this case 7246 and 7245)
– Change dnsidentity to match the root name of your wildcard certificate, eg company.com
– If you forget this step, you’ll receive an error message about a mismatched DNS identity
– From an administrator command prompt run iisreset to apply the changes
Add the NAV Addin to Outlook
– On your client machine, open a web browser and visit https://nav.company.com/NAVOutlook and sign in as your test account
– You should be prompted for Azure AD credentials which should work as you would expect
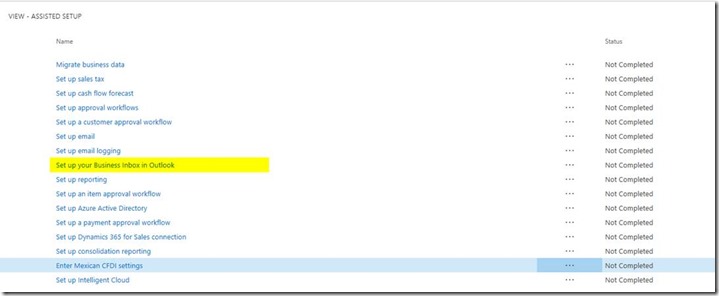
– Once signed in, click the lightbulb in the right and search for assist and click on Assisted Setup
– Click on Set up your Business inbox in Outlook
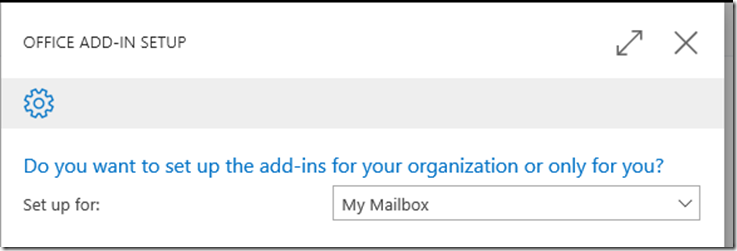
– Choose Set up for My Mailbox
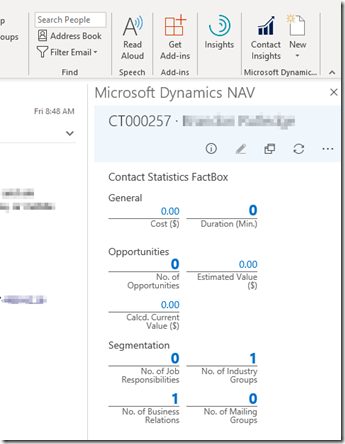
– Launch Outlook. You should have new Dynamics buttons in your ribbon
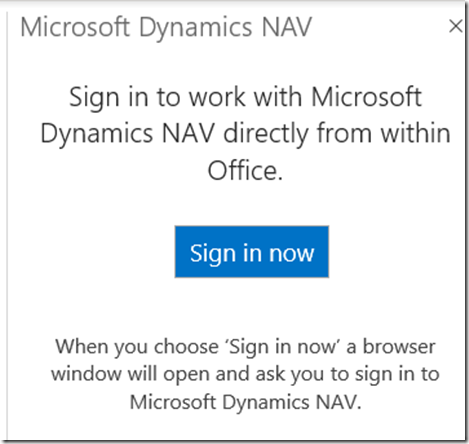
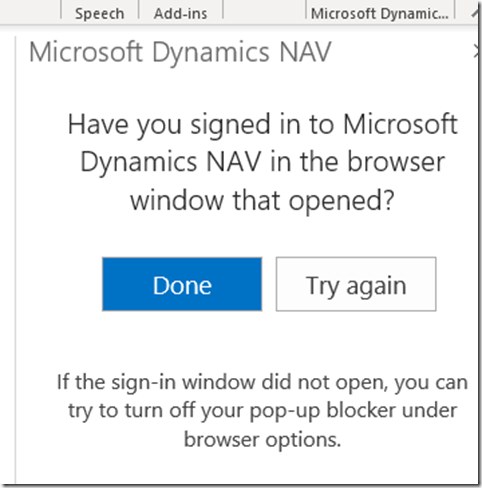
– Select one of the options and when prompted choose Sign in now
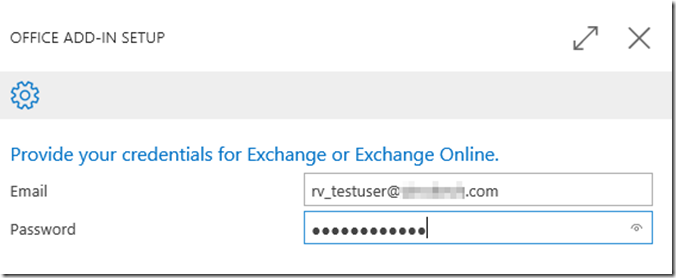
– Enter your AzureAD credentials. Once finished you’ll get a blank white screen. This is by design. Go back to Outlook and click Done when finished
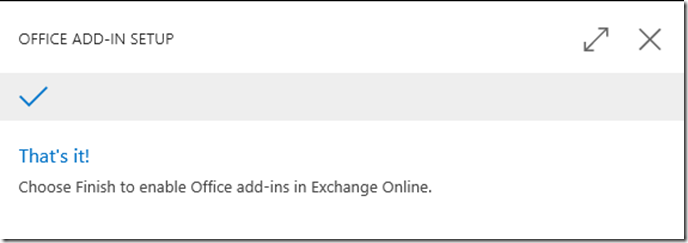
– That’s it. The addin should now be communicating with NAV as desired
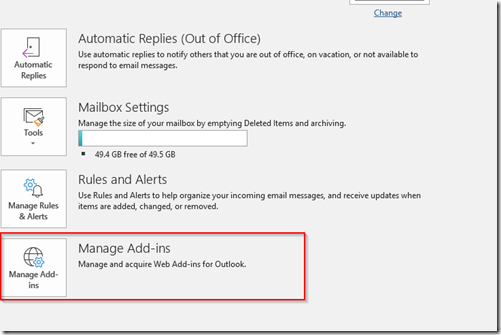
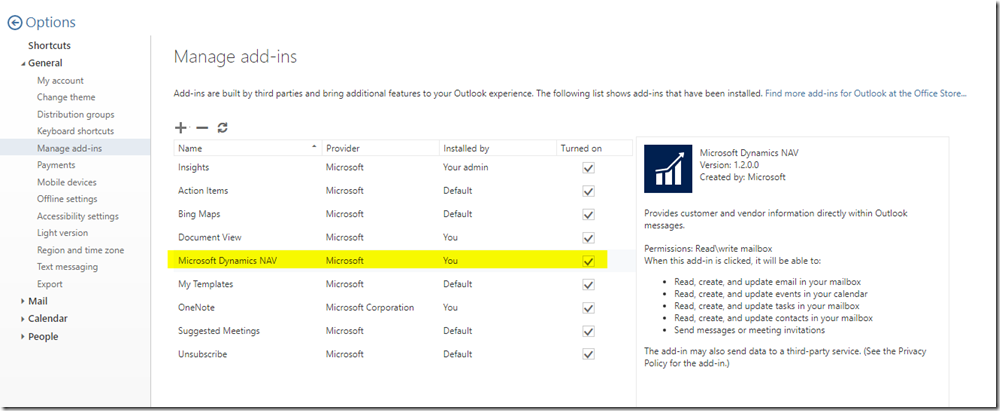
– For reference, the addin is controlled on the server side which means you can’t manage it through the traditional addins section in the Outlook options. To view the settings, click Manage Add-ins from the root of the Outlook options ribbon
Note this sometimes doesn’t seem to work. In that case you can try visiting the URL directly: https://outlook.office365.com/owa/?path=/options/manageapps










5 comments
Skip to comment form
Good afternoon, I was just visiting your site and filled out your feedback form. The feedback page on your site sends you messages like this via email which is why you are reading through my message right now right? That’s half the battle with any type of online ad, making people actually READ your advertisement and this is exactly what you’re doing now! If you have something you would like to blast out to millions of websites via their contact forms in the US or to any country worldwide let me know, I can even target your required niches and my prices are very affordable. Send a message to: trinitybeumer@gmail.com
Hi, I was just visiting your website and submitted this message via your “contact us” form. The feedback page on your site sends you these messages via email which is why you’re reading my message right now right? That’s the most important achievement with any type of advertising, getting people to actually READ your message and that’s exactly what I just accomplished with you! If you have an ad message you would like to promote to lots of websites via their contact forms in the U.S. or to any country worldwide send me a quick note now, I can even target your required niches and my prices are super low. Send a message to: Phungcorsi@gmail.com
Good morning, I was just on your website and filled out your contact form. The contact page on your site sends you these messages via email which is the reason you are reading my message right now correct? This is the holy grail with any type of advertising, making people actually READ your message and I did that just now with you! If you have an ad message you would like to blast out to tons of websites via their contact forms in the U.S. or to any country worldwide send me a quick note now, I can even focus on your required niches and my prices are very reasonable. Shoot me an email here: Benja57mik57@gmail.com
Hi robbievance.net,
I hope you are doing great!
I was going through your website on behalf of this email. It has a good design and it looks great, but it’s not ranking in top on Google and other major search engines.
I’m an SEO Expert and I helped over 250 businesses rank on the (1st Page on Google). My rates are very affordable.
Let me know if you are interested, then I can send you our SEO Packages and Price list.
Kinds Regards,
Kush
If you don’t want me to contact you again about this, reply with “unsubscribe.”
Hi,
Can we mention your website (robbievance.net) in our website?
Please review our post and give us a feedback if you are ok,
https://parcian.org/what-does-too-much-sun-exposure-do-to-the-skin/
Thank you,